Banishing the weekday blues with Primula*: fully-loaded potatoes

It has been seriously dull and rainy recently. I’m currently looking outside and everything just looks so grey. Raindrops are trickling down the windows,the trees are dancing about in the wind, and I’m still too cold to leave the heating off.

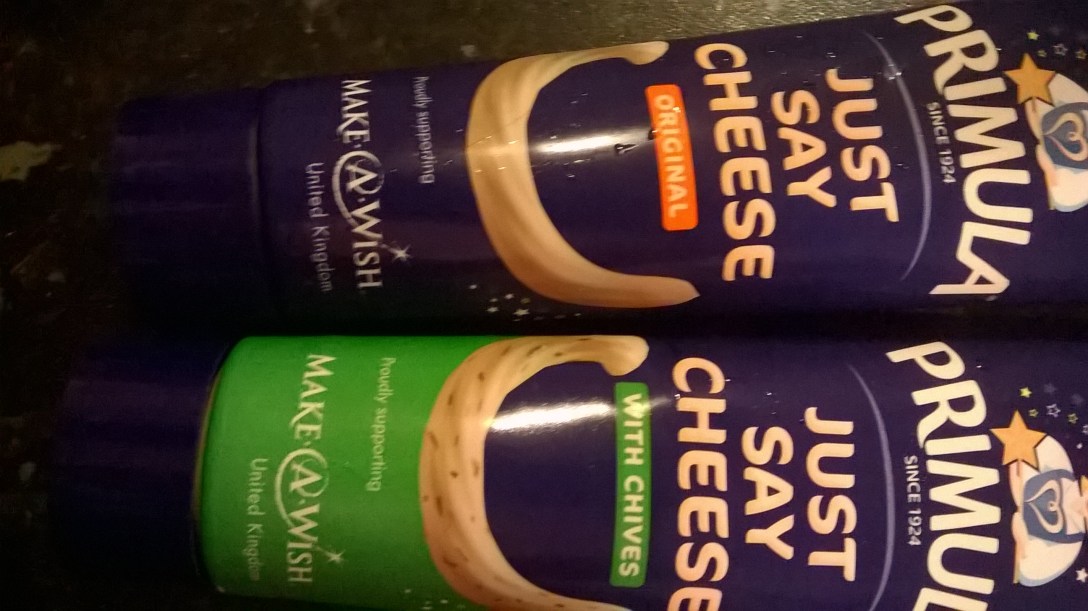
It was pretty much the same yesterday, so I decided to inject a bit of colour and deliciousness into my day with Primula Light. If you’ve read any of my other recipe posts, you’ll know I’m a sucker for Primula. I mean it’s just so easy to add a creamy, cheesy kick to meals and snacks without having to spend ages grating blocks of cheese. And believe me, my grating skills are almost non-existent (thanks, hemi!). So to kick start this drizzly year, I was asked if I fancied trying to incorporate Primula Light into my meals, and yesterday was the perfect day to showcase one of my favourite, easy lunches.

p1010692

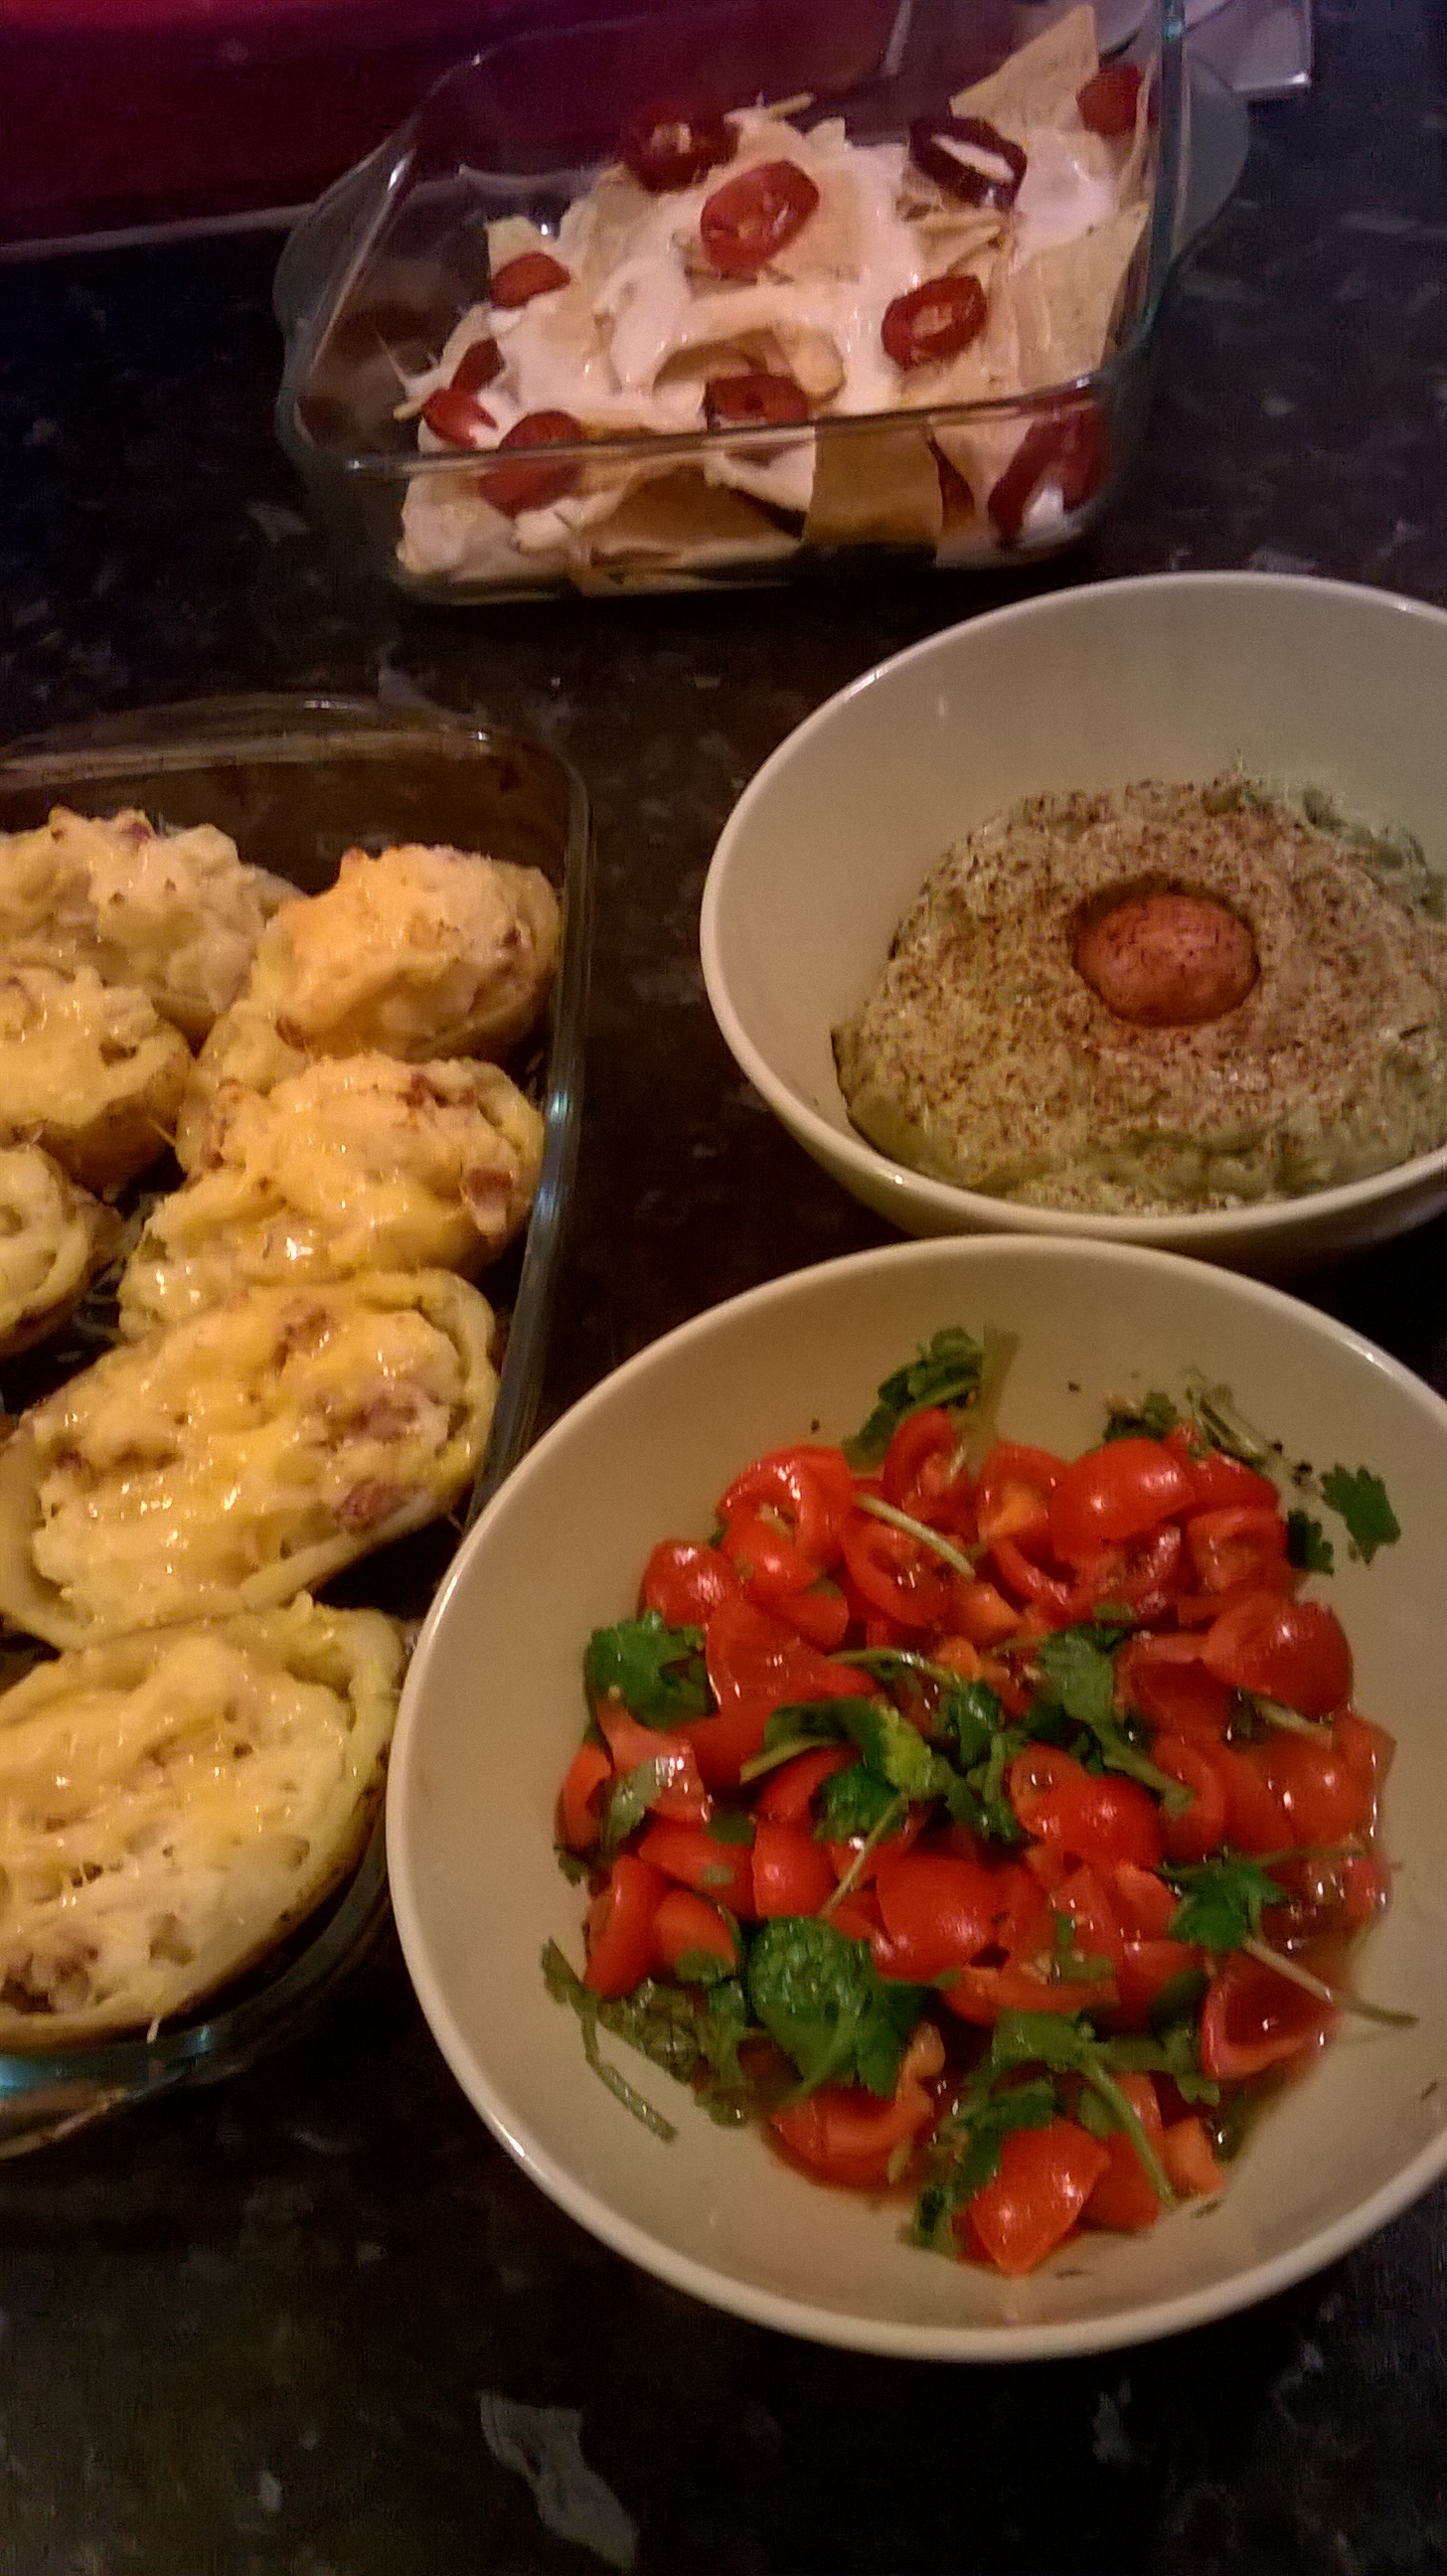
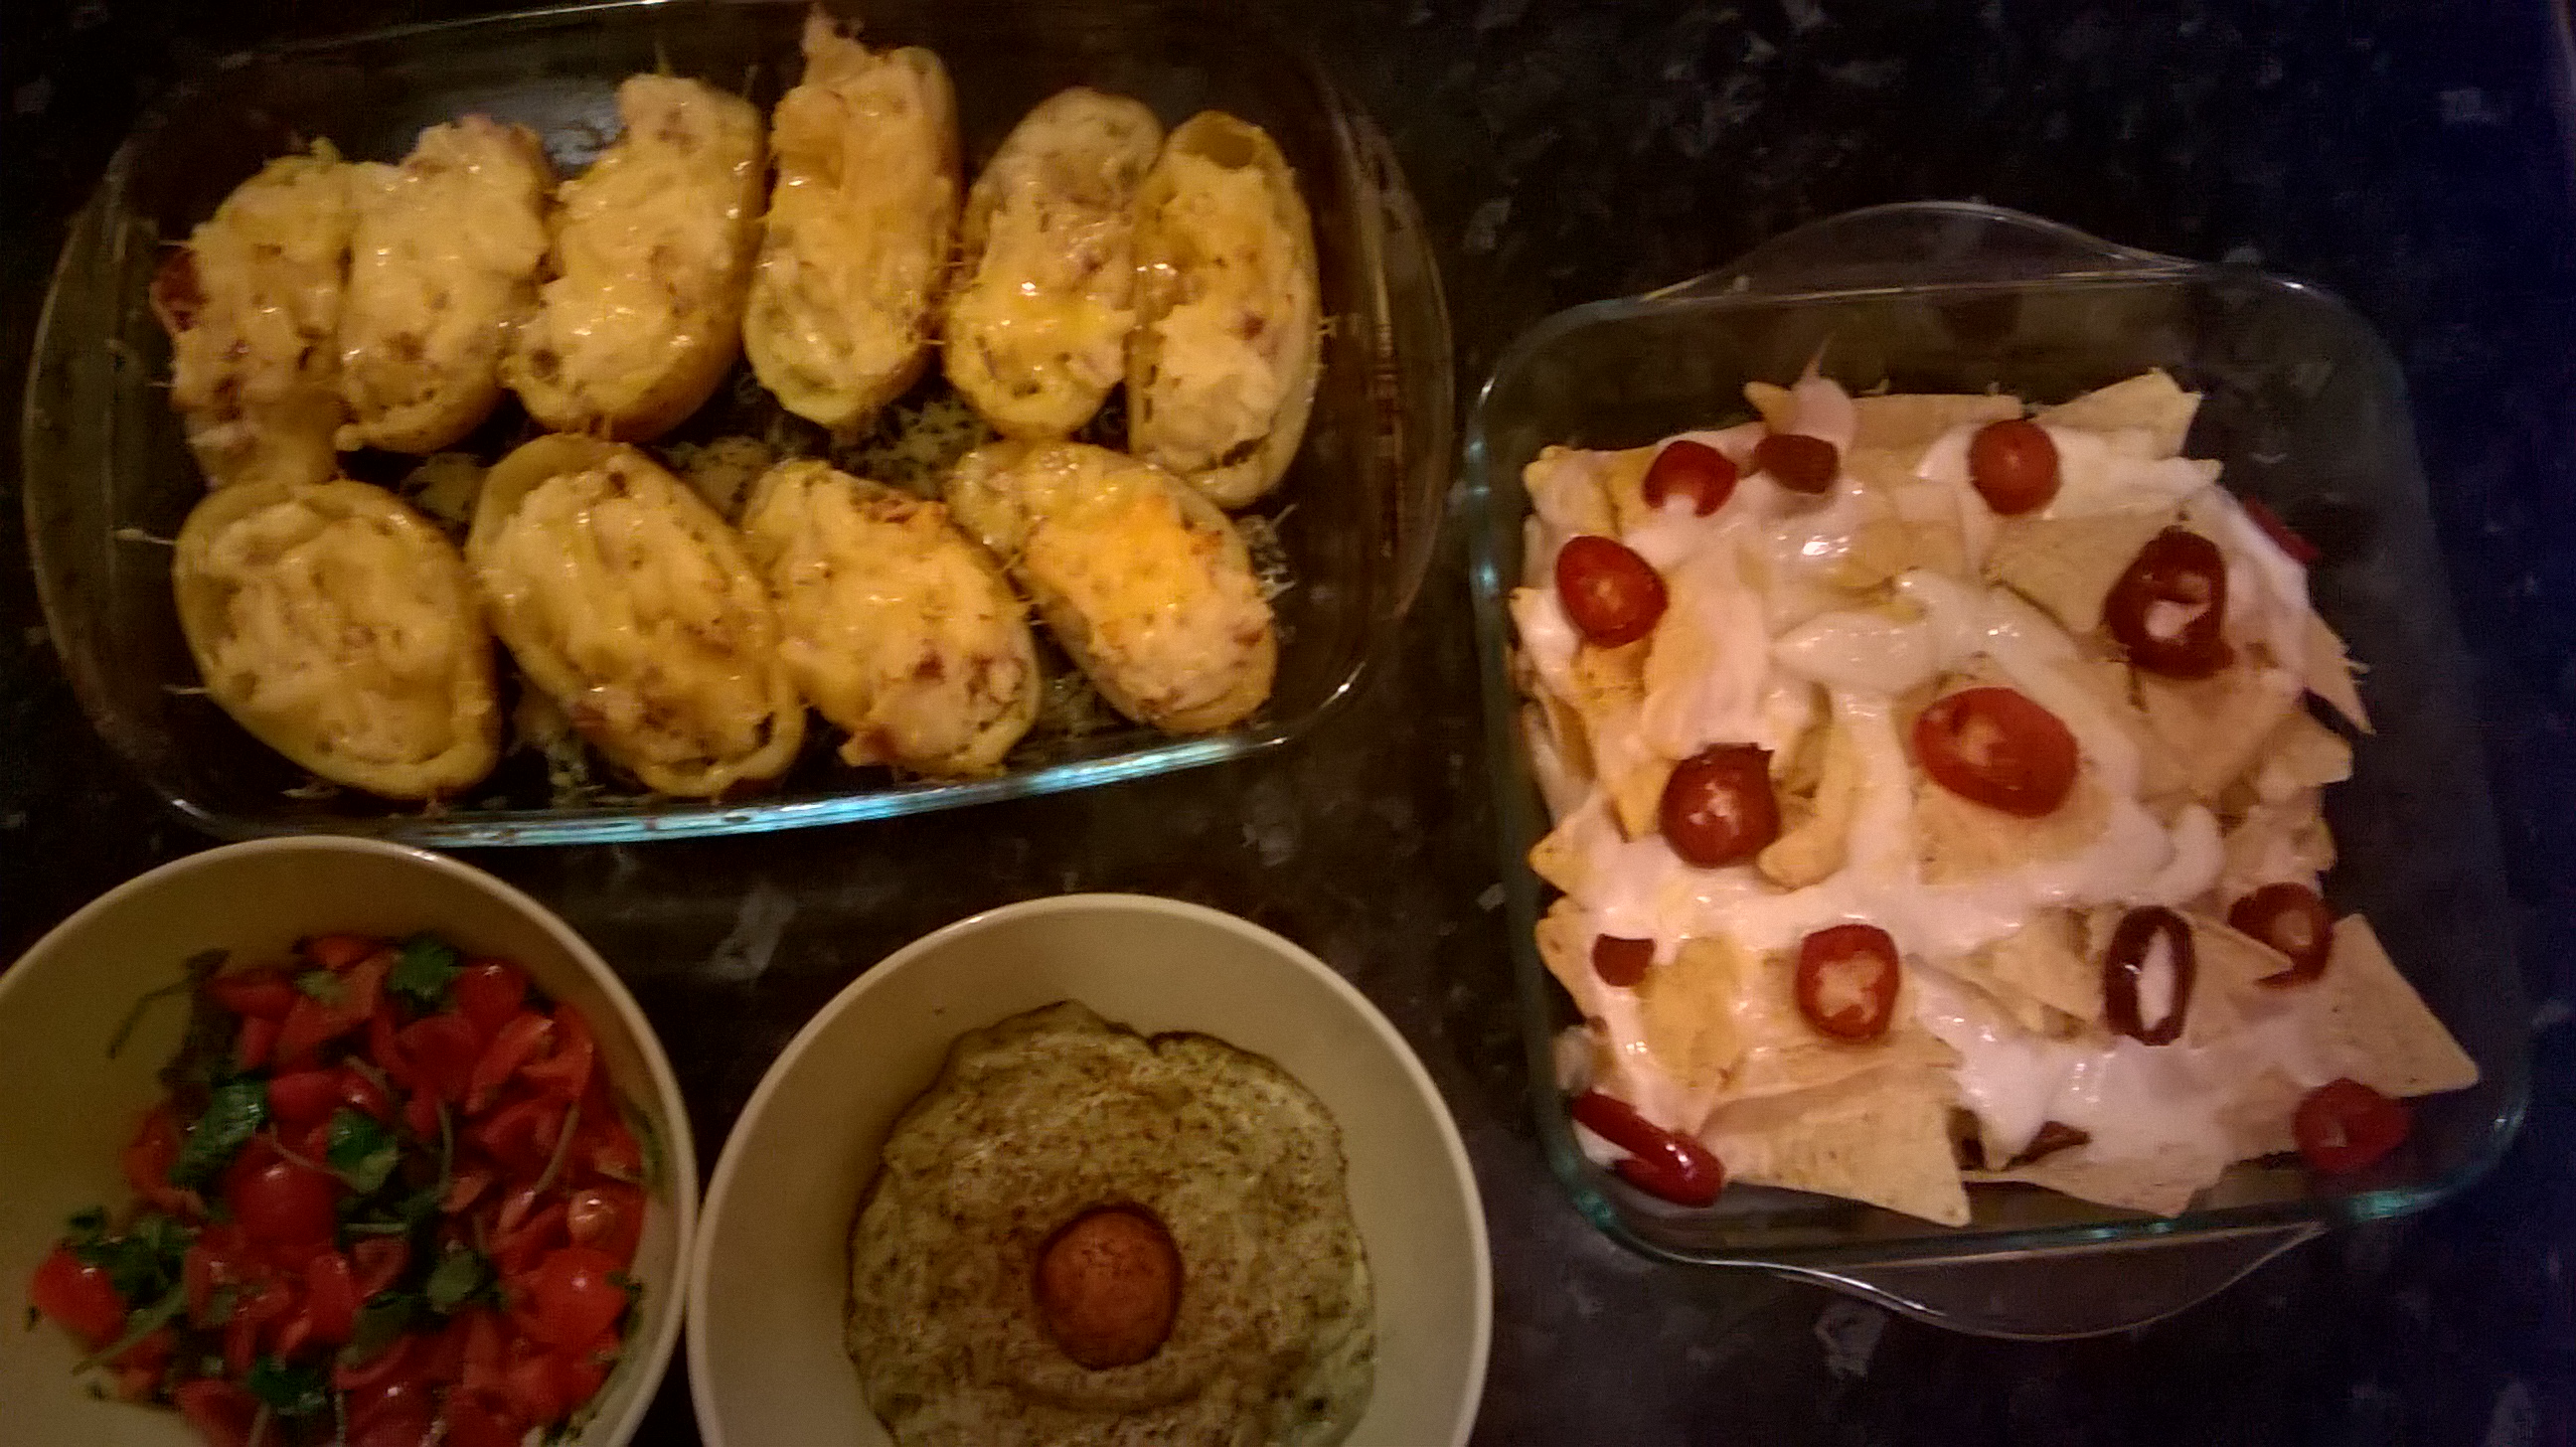
Bright, colourful, and delicious enough to blow the cobwebs away: my Mexican-style bean salsa stuffed sweet potatoes. Yes, it’s a mouthful; but one you’ll be oh-so happy about.

You will need:

A tube of Primula Light cheese

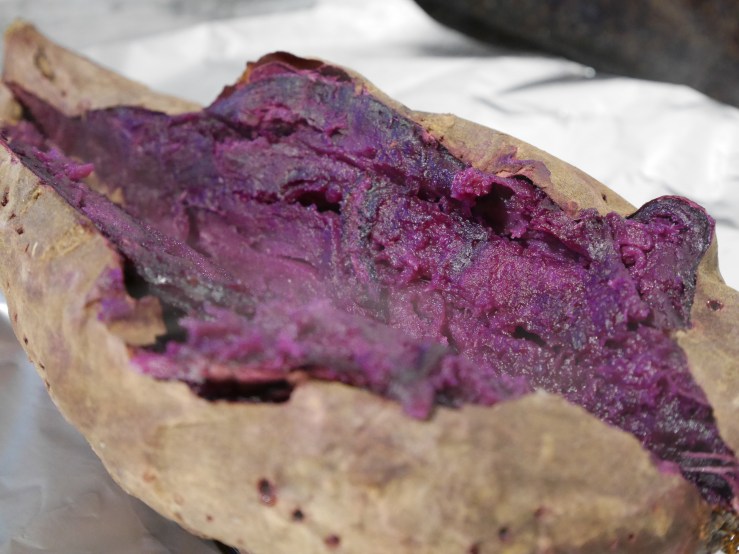
Four large baking potatoes or sweet potatoes (I used a fancy purple one to make my meal even brighter)

A tin of your favourite beans (I used black beans, but kidney beans or cannellini beans would also be yummy)

A tin of sweetcorn

A punnet of small tomatoes, roughly chopped (I used baby plum here)

One red onion, chopped

One lime, squeezed

One mild chilli, chopped

Handful of shredded mint leaves

Salt and pepper to taste

Paprika to sprinkle

Method:

1. Cook the potatoes. I cheated slightly here: I pricked each with a fork, and cooked them on high in a microwave for ten mins to give them a head start. I then popped them into a preheated over at 190 degrees until their skins were crisp and their insides fluffy. Be sure to lightly oil some foil before placing them on top: sweet potatoes in particular have a habit of caramelising and completely  sticking to baking trays!

p1010681
Just look at the colour of this! No filter needed…

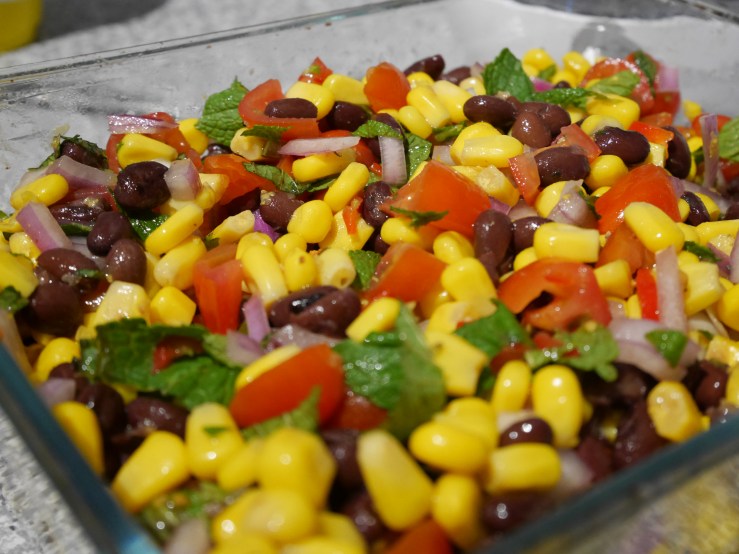
2. Whilst my potatoes were cooking, I  mixed together the drained beans, drained sweetcorn, chopped tomato and onions and shredded mint. I then squeezed over the juice of one lime, added the chilli and stirred. Then just season to taste and set aside.

p1010675
A delicious mix of ingredients that are nutritious and tasty. This would be great stirred into couscous, or on a salad

3. Next, you’ll want to prepare your potatoes. When cool enough to touch, cut you potatoes in half and fluff up the insides with a fork in order to leave enough space for the salsa filling.

4. Stuff as much filling into each potato as possible (you’ll want to: it’s yummy!). When stuffed, place back into the oven until the filling is cooked through.

5. Finally, drizzle some Primula Light cheese over each stuffed potato, and sprinkle that with paprika. Serve as it is for a lunch, or with a lightly dressed salad for something more substantial.

Just perfect: gooey, oozing with flavour, and deliciously bright. What’s not to love?

p1010689

That’s it! It’s really that easy to create something delicious, satisfying and nutritious for a weekday lunch or dinner. I’m going to make several of these to take into work for lunch, as I know they’ll keep me fuelled for the day. What do you think? Do you fancy giving this easy recipe a go?

Hope your week is off to a flying start; look after yourself, whatever you’re doing.

Heather x


Primula Snack Hacks: stuffed jalapenos*

Hello! It has been a while since I posted a recipe on here so today I thought I’d share with you one of my ‘snack hacks’! The lovely Holly at Primula asked whether I’d be interested in creating some snacks using deliciously squeezy Primula cheese, and hopefully you’ll enjoy making these as much as I did! These aren’t suitable if you’re not a fan of spice, so in that case stay tuned to see something a little more tame next week!

You will need:

An assortment of mixed chillies (fresh jalapeno peppers are best if you can get hold of them!)
Half a tube of Primula Light Cheese/Primula original…whichever you prefer!
Breadcrumbs or something similar (I used matzo meal which is very similar in consistency)
Any additions to your filling; chopped crispy bacon, finely diced spring onions, fresh parsley…the more creative the better!
Salt and pepper to season

Method:
1. Prepare your chillies! It’s a great idea to wear some disposable rubber gloves for this and avoid rubbing your eyes at all costs! I sliced mine into halves, keeping the stalk on when possible. I then scraped out the seeds and membrane of each half.

image

image

image

Set aside once prepared.

2. Prepare your Primula filling. For these I stuffed half with plain Primula and half with Primula mixed with finely chopped crispy bacon. If you’re mixing ingredients into the Primula, now is the time to do it! Season to taste.

image

Once the filling is prepared, carefully spoon into the chilli halves.

image

image

Once filled, prepare your breadcrumb topping. You can again season this to taste if you’d prefer; parmesan, grated lemon zest and some dried herbs would make great additions. Place the breadcrumb/matzo mixture into a bowl.

image

image

3. Carefully coat the Primula filling with the breadcrumb mixture. I found it easier to dip the chillies Primula side down into the mixture, which ensures even coverage. Once breadcrumbed, place onto a baking dish sprayed with vegetable oil.

image

It also helps to spray/drizzle some oil over the top of the chillies. Once prepared, place into an oven heated to gas 7/220 Celsius for around 25 minutes. They should be piping hot and golden when cooked.

image

image

That’s it! They really are very simple to make. I finished the dish with some chopped fresh parsley. Be careful when you bite into them as the filling will be hot! They can also be enjoyed cold if you’d prefer.

We really enjoyed them, and I think they’d be great for a film night with a few drinks.

Do you think you’d be making my Primula Snack Hack? Let me know if you give it a go; I’d love to see pictures!

Heather x

Cooking up an Easter Feast with Primula: Creamy Chicken*

Hello! How are you? It’s really sunny over here today and I’m having a day of recipe-developing and MRes work (which never stops!). You might remember a few days ago I posted a recipe using Primula cheese and created a super-tasty tart. You can find that recipe here.

I wanted to come up with something quick yet tasty, and I think I made just the right thing to fulfil those requirements!

image

Ingredients:

Two chopped chicken breasts,
Handful of chopped mushrooms,
1/2 chopped onion,
1/2 tube of Primula Original cheese,
150ml single cream,
2 chicken stock cubes,
2 crushed garlic cloves,
Rice/pasta to serve,
Green salad to garnish (optional).

Method:

1. Soften onion and brown chicken over medium heat in a frying pan. Add the crushed garlic.
2. Add the chopped mushrooms to the pan and fry with the chicken, onion and garlic.
3. Turn heat to low, and add 1/2 tube of Primula cheese. Combine well.
4. Stir in the cream, combining well. Here is where you can add the stock and cracked black pepper of desired.
5. Leave to simmer on low heat, ensuring the chicken is cooked through and everything well-combined.
6. Serve immediately over rice or pasta. I also served ours with a simple salad dressed with olive oil.

Couldn’t be easier!

image

image

I hope you’re enjoying this Primula series; I have a really tasty dessert perfect for an Easter feast coming your way soon!

Have a wonderful day,
Heather x

Cooking up an Easter Feast with Primula*

Hello there! I have a little recipe for you today. I was kindly contacted by Holly a couple of weeks ago asking if I fancied coming up with some recipes using primula cheese; it was an offer I couldn’t refuse!

image

I’ve made some recipes using primula cheese before and have been extremely impressed with the results. Admittedly before being contacted by Holly I’ve only ever thought of primula as a tasty sandwich filling or toast topper, but it turns out that with a little imagination primula can help you to create easy – and incredibly tasty – meals and snacks.

I decided to develop a series of dishes that could feature as part of a celebratory Easter menu, but that would easily translate into everyday dishes for when you’re feeling a little adventurous and in need of something a little different. Because of my hemi hand I really struggle to grate cheese: it sounds odd, but when one hand doesn’t want to cooperate it makes it hard to complete simple tasks. Primula cheese is fabulous for me because it’s very easy to add to many dishes due to its squeezy tube, and I have been finding it enjoyable in a variety of different things. 

Today’s installment of the menu is the starter, and would also make a really tasty (and easy) midday dinner for a family.

Primula Puff Pastry Tart

image

Ingredients
A roll of ready made puff pastry (don’t bother making it yourself. Ease is key here!)
Three sliced large tomatoes,
Half a tube of original Primula cheese,
One finely chopped spring onion,
A handful of crispy bacon pieces (lardons are also ideal),
Olive oil,
Cracked black pepper,
Finely chopped fresh parsley to garnish,
Salad leaves to serve (optional).

Method

1. Roll out your puff pastry sheet; this should be fairly easy. If frozen make sure it’s fully defrosted before trying to unfurl it, or it will crack. Place the pastry onto a sheet of baking paper and place onto a baking tray.

image

2. Prepare your fresh ingredients, and fry off the bacon (or lardons) until crispy. Preparation before hand will make assembly of the tart a lot easier!

image

image

3. Spread approximately half a tube of Primula onto the pastry, making sure to leave space to form a lovely crispy crust.

4. Sprinkle on your chopped bacon and spring onion and layer your tomato slices over the top, ensuring you leave the edges free of ingredients once more. Season with pepper to taste, drizzle the tomatoes with olive oil and place in an oven heated to 180° celcius/gas mark 4/5.

5. Cook for around 20-30 minutes, or until the pastry is golden and crisp, but make sure you keep an eye on it to avoid burning the edges. Once removed from the oven sprinkle liberally with parsley or another herb of your choice; basil would also be a delicious addition.

6. Cut up into slices; ours was cut into six generous slices but would easily feed more if the portions were made smaller. Serve hot from the oven or leave to cool and serve at room temperature with a crisp green salad on the side.

image

image

image

I was really impressed with this, and I’m keen to try out some different toppings in the future; the possibilities seem (almost) endless!

I hope you enjoyed this first installment. Keep your eye out for more recipes using Primula cheese over the next couple of weeks…I have lots of cooking to do!

I hope you’re having a great Sunday whatever you’re doing, and let me know if you give this a try; I’d love to see what you think!
Heather x

Easy Eats: Nutritious Snacks

Hello there, lovely reader. A while ago I mentioned I was going to start writing up some easy, spoonie-friendly recipes and ideas. For new readers (hi!) I actually have a form of cerebral palsy called mild hemiplegia and a painful spinal condition called scheuermann’s. My cerebral palsy limits coordination and movement in my affected side and can also be painful, and alongside my recent diagnoses of depression and anxiety these can be a tiring mix!

On painful and tired days it can be a real struggle to eat well, so I thought i’d share some tips with you.

When having a bad day I tend to snack because I can’t muster up the energy to create a really nutritious, home-cooked meal. Here’s a few snacks I’ve come up with to help me on tough days:

Homemade granola
This is a really yummy, super easy thing to make. I store it in a big Kilner jar *insert heart emoji here* and then just dig in when I feel like it. It’s fab for breakfast, but like most cereals it’s great to snack on when you’re feeling a little peckish.

What you need:
2 cups of porridge oats (make sure they’re the proper ones, not the ones that make instant porridge)
2-3 tbsps of honey or maple syrup (I used half and half)
2-3 tbsps of oil (I used rapeseed oil but melted coconut oil would also be lovely)
Pinch of salt
Any yummy additions you’d like to add including dried fruit, nuts or even chopped chocolate. I used very dark chocolate (80% I believe) for a really chocolatey hit

Method:
1.Turn on the oven to around gas mark 2/150°
2. Mix all the oats, syrup, oil and salt in a mixing bowl until well combined. If adding nuts, you can add them to the granola at this stage to get them all lovely and toasty.
3. Prepare a baking tray by covering in grease proof baking paper to prevent sticking.
4. Spread the mixture onto the tray and place in the oven.
5. Cook for around 40 mins to get the oats lovely and toasted and golden. However you must make sure you continue to check the granola at 10 minute intervals: it can burn very quickly so be sure to keep an eye on it.
6. Remove the tray from the oven and leave to cool completely.
7. Once cooled, feel free to mix in as many yummy additions as you’d like. There is no measuring needed here; it’s completely up to you!
8. Once well mixed, place into a clean jar or container and this will keep for a good couple of weeks…if you can bear to leave it of course!

image

I love mine with plain natural yogurt and the addition of fresh fruit. Blueberries and raspberries are lovely in this.

Fresh zesty salsa
One of my favourite dips. When feeling like a snack it’s great with tortilla chips, but for a more substantial meal I love eating it with oven baked wedges made using chopped potatoes or sweet potatoes.

What you need:
A handful of cherry or plum tomatoes (whichever you prefer)
Half a fresh lemon or lime (again, whichever you prefer)
A spring onion
Pinch of salt
Pinch of black pepper
Half a teaspoon of sugar
Glug of olive oil
Fresh chilli if you like it hot

Method
The easiest way to do this is to use a small food processor or chopper. We have a brilliant little processor from Aldi and this is really useful if low on energy (or simply don’t want to chop everything by hand!) If you don’t have a processor or if you want a chunkier salsa feel free to chop by hand

1. Wash veggies and put them into the processor/chop up.
2. If using a food processor, gently pulse to get required texture.
3. Add salt, pepper, olive oil, lemon/lime juice, sugar and chopped chilli if using. Taste and adjust seasonings accordingly.
4. Serve alongside tortilla chips, potato wedges, or anything else that takes your fancy!

image

Sometimes I add chopped coriander which is also lovely. Sorry for the rubbish photo: I simply couldn’t wait to get stuck in!

Easy Banana “ice cream”

I’m oh so late to the party with this, but it is a delicious sweet something when you want to have dessert but feel too bad about diving into the tub of Ben and Jerry’s at the back of the freezer. Yummy!

What you need:
1 chopped banana per person
Optional toppings/flavours. I like nutella, peanut butter or Sweet Freedom’s Choc Shot

Method
1. Peel and roughly chop the banana.
2. Place into a sandwich bag and pop in the freezer
3. Leave until fully frozen and solidified
4. Remove from freezer and let it thaw out slightly
Place in a food processor or chopper, and pulse the banana until thick and creamy. Swirl any additional flavours in at this stage.
5. Serve and add toppings!

To make this really healthy omit the nutella (it is full of sugar but great for a treat) and replace with a drizzle of honey, chopped frozen raspberries, almonds or anything else that takes your fancy!

image

image

The above pictures are an example of the less-healthy version…though choc shot is low calorie!

I hope you’ve enjoyed this post. Be sure to watch out for some more easy recipes; there’s lots more I want to share with you. Meanwhile, look after yourself and happy Thursday!

Heather x

‘Spoons’ and ‘Easy Eats’

There’s a little analogy those of us with chronic illness and/or disabilities like to use to try and describe the difficulties living with chronic illness create. This is called the ‘Spoon Theory’, and you can read this (rather lengthy) post by Christine Miserando which – perhaps ironically – takes lots of ‘spoons’ to read and understand (see here).

In simple terms, the idea is that each day you’re allocated a certain number of ‘spoons’. These spoons = energy. When someone is chronically ill/disabled, they use far more energy than an able bodied person (and I recently found out people with cerebral palsy expend between 3-5 times MORE energy than someone without CP. No wonder I’m asleep a lot of the time!).

Thing is, when you’re ill/have difficulty coordinating your body, things become harder to do, and you end up having to prioritise some tasks over others. Getting out of bed and getting dressed/doing teeth might cost me one spoon on a good day. That leaves nine to complete the rest of the day’s tasks.

Getting to uni on the bus and having to stand because there’s no seat: one spoon. Sitting in a three-hour seminar: two spoons. Getting on the bus home: one spoon…and, well, you get the picture.

If I exert myself too much one day, I just know I’m going to regret it the next. And if that’s the case, I might wake up with eight spoons rather than ten.

This can make all manner of adulty-things difficult. Before occupational therapy came round and installed some things to help me around the flat, having a shower for instance could be a real trouble, particularly because not only does my spine hurt/my neck hurt/ my right arm struggle to lift above my head to wash hair etc, but my palsy means my balance can be really off. I have slipped in the shower more times than I care to remember.

This also means preparing healthy, nutritious meals can sometimes be a real trouble. Luckily Drew is a super good cook (though he’d never admit it) and he helps me out more than I can say. However, when I’m home alone, and I have very little spoons, cooking can be a nightmare – and don’t even mention the washing up!

That’s why I thought I’d start a new section on here: Easy Eats (or something like that…I’m trying to be creative but failing rather miserably!). Of course, anyone can make these, but my aim for these posts is to create healthy, (hopefully) tasty, delicious meals easily with as little effort as possible, and I’ll try to include some hints and tips to make life just that little bit easier in the kitchen.

When you’re constantly ill eating well is absolutely essential; and, annoyingly so, a lot  easier to say than it is to do. I’m hoping this will be a useful addition to the blog; let me know what you think!

Watch this space!

Hope you’ve had a great Wednesday,

Heather x

Cooking in the Kitchen with Primula cheese*

If you’ve been reading for a while you might be aware that I’m into cooking. I find cooking great therapy, and usually on bad days Drew will come home to cakes/biscuits/bread, or indeed a mixture of all three. Because cooking requires lots of preparation , I don’t  always find it easy to create fresh meals from scratch, particularly if I’m in a lot of pain.

This is where Primula comes in!

Primula were kind enough to send me some products from their range of cheeses. I’m sure you’ll remember these; they are firm favourites as sandwich fillers and, as I found out, great for handy shortcuts in favourite meals!

I decided to get creative and made a variety of Primula cheese-inspired dishes, which were very easy to prepare and extremely tasty!

Firstly, I decided to try making some cheesy stuffed potato skins.

Here’s what you’ll need:

5 medium sized baking potatoes,

half a tube of Primula Cheese and Chives,

4 rashers of smoked bacon,

a drizzle of olive oil,

seasoning to taste,

a small amount of grated cheese of your choice (I used double Gloucester).

Firstly, you’ll need to prepare the potatoes. I made sure to prick each potato with a fork several times (as it lets the heat escape) and put them in the microwave on a plate at full power for 15 minutes, or until the potato is cooked on the inside. Meanwhile, turn the oven on (about 170 degrees/gas mark 6).

As the potatoes were cooking, I chopped my bacon in bite sized pieces and grilled using my handy George Foreman grill. I remember when these were all the rage, and I must admit that we have had a lot of use out of ours as they make cooking  really easy and are very quick to clean! Perfect if you’re low on spoons/energy/just don’t want to spend ages cleaning up. I grilled these bacon pieces until they were crispy and golden.

When the potatoes were cooked and the insides like mashed potato, I carefully scooped out the flesh into a jug (you could use a mixing bowl) added my crispy bacon and put the empty skins into a non-stick oven dish. I then squeezed in approximately half a tube of Primula’s delicious cheese and chive into the potato and bacon mixture, stirring well. Here is where you should add a drizzle of olive oil; it can be really hard work to mix everything in evenly! Crack in some black pepper and season to taste, before dividing the mixture out and placing it back into the empty skins. I then topped with a scattering of grated cheese.

Pop them into the oven until they are piping hot, golden and bubbly, (approx. 15-20 mins) and voila! Delicious, easy and filling; perfect for these wintry, chilly nights we’re having.

Here’s a pic before they went into the oven:

Stuffed potatoes

I also decided to make one of my all-time favourite snacks – cheesy nachos –  using Primula’s original cheese. Again these were super easy to do, and extremely yummy.

All you’ll need:

A bag of salted tortilla chips,

a tube of Primula original cheese,

grated cheese (if you like things really cheesy!)

and a jar of jalapeno peppers to heat things up a bit! I chose red peppers, as they are hot yet sweet.

These are super simple. Just pour the bag of tortilla chips into an oven-proof dish, squeeze as much Primula original cheese onto the top as you wish (and yes, I did put plenty on there!) and add the jalapenos/extra grated cheese if you fancy. I then just popped them into the oven (again, 170 or gas mark 6) until the cheese was bubbly and the chips lovely and toasty. Just keep an eye on them, though. 15 minutes will be sufficient. They really were lovely and the Primula cheese was a perfect topping for them. Here’s a quick picture I managed to take before Drew and I devoured them all:

cheesy nachos

I’m a big fan of fresh guacamole – particularly with cheesy nachos – so I couldn’t resist making my own (with the help of Primula cheese, of course!). This time I opted to use Primula cheese in light. You will need:

2 ripe and ready to eat avocados,

juice of half a lime/lemon (I used lime this time),

Primula cheese in light (about a third of a tube)

salt,

cracked black pepper,

some coriander leaves; as many as you’d like,

cayenne pepper to garnish.

Homemade guacamole is so easy, it’s almost not worth buying it premade! All I did was scoop out the flesh of both avocados (but keep the stones in the middle; you’ll see why soon!)  and put into a food processor along with the lime juice, a pinch of salt, twist of black pepper, Primula light and coriander. I then whizzed up the mixture to form a smooth, well-mixed paste. I then placed the guacamole into a bowl after checking it was seasoned to taste, and placed one of the avocado stones into the middle of it. The reason for this is it helps the guacamole to keep its bright green colour. I then sprinkled cayenne pepper on top (just a little; you can of course skip this step entirely) and it was done! The Primula really added a creaminess to the guacamole and it’s something I’ve never thought of adding before. I definitely will now!

Here it is:

salsa and guacomoleguacamole

As you can see I also made a super-quick tomato salsa to go with it. All I used were chopped cherry tomatoes, coriander, the juice of half a lime (or you can use lemon if you prefer) a teaspoon of sugar, a drizzle of olive oil and a pinch of salt and pepper. Then all you have to do is mix them together! Very easy and a great accompaniment to the guacamole.

All in all I’m really impressed with Primula cheeses. They taste great and make mealtimes so much simpler. You can find Primula in the dairy aisles of all good supermarkets, or check out their website here to check out more about their products and collaboration with the charity Make a Wish.

primula feastPrimula feast 2

Let me know if you decide to try any of these!

Hope Saturday is treating you well.

Heather x

ps sorry for the terrible photos; i’m having to make do with my phone camera which has no flash and is generally rubbish, so bear with me! I should have my camera soon 🙂

Old El Paso Tacos*

Hi there! Today I have another recipe/food review for you all. Another lovely thing from the Hull Bloggers meet was the Old El Paso meal kits. I LOVE the fajita one, and find myself eating it maybe once a week. It’s a really easy meal, and I find it’s fairly balanced, having lean protein, fresh salad and vegetables and a helping of carbohydrates in one quick, easy meal. I usually skip sour cream, too, but if I am feeling like something creamy on my fajitas I’ll opt for low fat natural/greek style yogurt.

Taco shells and seasoning

These tacos offered something a little bit different. I received the spice sachet from the meet, but  bought the taco shells from a supermarket. As expected they were really easy to make, and my  boyfriend and I thoroughly enjoyed them.

taco shells

Taco shells and seasoning

The packet called for 500g of minced beef to serve 3-4, so  because there’s only two of us we opted to use 250g and add a good handful of roughly chopped mushrooms and half a chopped red pepper. We also prepared plenty of chopped spring onions, cherry tomatoes and grated mature cheddar to top the tacos with.

ingredients

tomatoes and spring onionchopped veggies

All we had to do was to brown off the minced beef in a fairly hot (but not smoking) frying pan, along with the chopped peppers and mushrooms. You then add the entire sachet of the spicy beef taco seasoning, stirring to combine the seasoning with all the ingredients.

peppers, beef and mushrooms

When nicely browned, add 100ml of water and turn down the heat. Allow to simmer and reduce to a thick, rich filling.

And that’s it! All we had to do was assemble our tacos. We had three each, and found this more than enough. We used crisp green lettuce, taco filling, grated cheese and finally sprinkled a liberal helping of fresh tomatoes and spring onions on top.

finished tacos

tacosThese were really lovely; spicy, but not overwhelmingly so by any measure. Just enough heat but with a full-flavoured, mexican style spice. I would repurchase, and think they’d make a great meal to gather everyone together around a dinner table. Perfect for sharing with your friends!

I hope you’ve enjoyed this review, and let me know what you think of them if you get to try them!

Happy cooking,

Heather

Banana American pancakes

Hi there! It’s so good to be back blogging in 2015! Christmas and New Year was a great time to relax, see friends and family and just generally have an enjoyable time. I hope Christmas was a peaceful and relaxing period for yourself. I got some really lovely, thoughtful gifts, and it was lovely giving something special to those who have done so much for me this past year.

However, now it’s January, it’s back to work and the hustle and bustle of university life! I did say in an earlier post that I adore cooking and I love tweaking new recipes to make something really tasty. So, in light of this, I thought I’d share with you a really easy breakfast recipe to really set your day off to a great start. Something to keep you going until lunchtime…perfect for busy, work-filled days!

To make measuring easy, I use a cup. This isn’t strictly the American cup measurement system, however, if you use the same cup/mug to measure out your ingredients in, it works just the same and it’s far easier than getting your weighing scales out!

Serves 2 (makes 2 good-sized fluffy pancakes each)
You will need:

3/4 cup of self-raising flour
A pinch of salt
A pinch of baking powder
Half a teaspoon of white granulated sugar
1 tablespoon of melted butter, cooled
Just over 1/2 cup of milk (whichever you like: I used whole milk)
1 large egg, beaten
Splash of vanilla extract (if you can get hold of some)
Butter and a splash of vegetable oil, for frying
1 banana, sliced (optional)
Runny honey (optional)
Toasted almonds (optional)
Greek yogurt (optional)

I find it’s far easier to make the batter mix in a jug. You can then pour out the mixture into a saucepan rather than using a ladle or something similar. Put all of the dry ingredients into the jug. Whilst stirring, add your wet ingredients until combined. Try to knock out some of the lumps, but don’t expect your batter to be completely smooth. It’s best not to overwork the batter so that it stays lovely and fluffy whilst cooking. I also cook my pancakes separately so that I don’t overcrowd the pan. I then just pop the pancakes in a low oven to keep warm whilst I’m cooking the rest, so pop the oven on a low heat (50 degrees centigrade or lower will suffice).

When the batter is combined, pour the batter into the buttered pan, on a medium heat. If you add a splash of oil to the butter in the pan, it will prevent the butter burning and becoming dark brown. That’s not the aim here: we want lovely golden pancakes, not burnt ones! I like my American pancakes to be fairly large, but not so big that they won’t fit onto a side plate.

Once you’ve poured the batter into the pan, place slices of the chopped banana (if using) into the wet batter of the top of the pancake. Cook the pancake until the top of the batter (the side you’ve put the banana on) is beginning to bubble. Turn the pancake over when it’s golden brown. The side with the bananas on will only take a couple of minutes (if that) to cook. Place in the oven to warm whilst you cook the rest.

When you have cooked your lovely pancakes, stack onto a plate and top with whatever you fancy! I had honey, toasted flaked almonds and Greek yogurt which I thoroughly recommend. Chocolate spread, peanut butter and other fruits would also make lovely toppings. If you don’t like banana, you can substitute it for a handful of blueberries, raspberries, or sliced strawberries. Delicious!

IMG_7417.JPG

Let me know how you get on with them. Happy cooking!
Heather